Sunday, February 27, 2011

February Adventure: World's best Bread!

Hey Bloggers! Do you love homemade bread? I know we do! Making your own bread is cheap, healthy, and so tasty! Now some bread recipes aren't the easiest, but our recipe is almost fool proof. The only thing that hard about it is having enough time and having the right mixer.
Easy Bread Recipe
Makes 2 loaves
5 cups of flour ( you can do anything from all purpose to whole wheat)
1 1/2 tablespoons of dough enhancer
1/2 tablespoon of salt
1 Heaping tablespoon of yeast
1/3 cup of honey ( you can use sugar, but honey makes the bread softer)
2 tablespoons of oil
2 cups of hot water
Cooking Spray
Preheat the oven to 200 degrees. Briefly mix dry ingredients ( this recipe works best with a bosh).You only add 3 cups of flour at this point. Put the salt on one side of the bowl, yeast on the other. If you put the yeast and salt together, the salt will kill the yeast and your bread will be flat. Then pour in honey, oil, and water. Then the remaining flour, then mix. If the dough is too wet add a tablespoon of flour, if too dry add a tablespoon of water. Then on a low medium speed knead the dough for 8- 10 minutes ( this is the easy part the mixer does all the work for you). Turn off the oven (we just needed a warm place to rise our dough, but we don't want it hot.) Spray a clean part of the counter with Cooking Spray. (Instead of kneading the dough out on flour we are going to use oil this will make the bread less dense.) Lay down the dough and knead it, making sure there are no air bubbles. Form the dough into a ball and cut the dough in half with a knife (instead of tearing the dough we will cut it so we don't tear the gluten. It will also result in a straight edge when you cook it.) Put the dough into pans that have been sprayed and let it rise in the oven for 30 minutes of until it is double the size of the pan. Once it has risen Bake at 350 degrees for 25 minutes until golden brown. Carefully take out the bread and put it on a cooling rack. When cool enough to touch, slice and serve. Enjoy!

Saturday, November 20, 2010

Thanksgiving Adventure: Turkey Pops

Hey bloggers! Wondering what to do for this Thanksgiving? Well we've got a treat for you! It's cute, chocolatly, and festive! It a Turkey POP!
Here's what you will need:
1 Brownie Mix
1 can of Chocolate Frosting
Licorish String
4 squares of chocolate almond bark
1/3 stick of butter
1 bag of sliced almonds
Lollipop sticks or toothpicks
Nerds Candy or Sprinkles

Step 1: Bake a batch of brownies according to the box. Let it cool until it is cool enough to touch.
Step 2: Make a golf sized ball out of brownie. A batch of brownies should make about 16. Let it cool in the fridge for 15 minutes.

Step 4: Scwer the brownie balls with lollipop sticks or toothpicks.
Step 5: Place the 4 squares of chocolate almond bark in a bowl. Put the butter on top and melt it in the mircowave for 2 minutes, stiring it every 30 seconds. When melted it should be simlar to a paste.

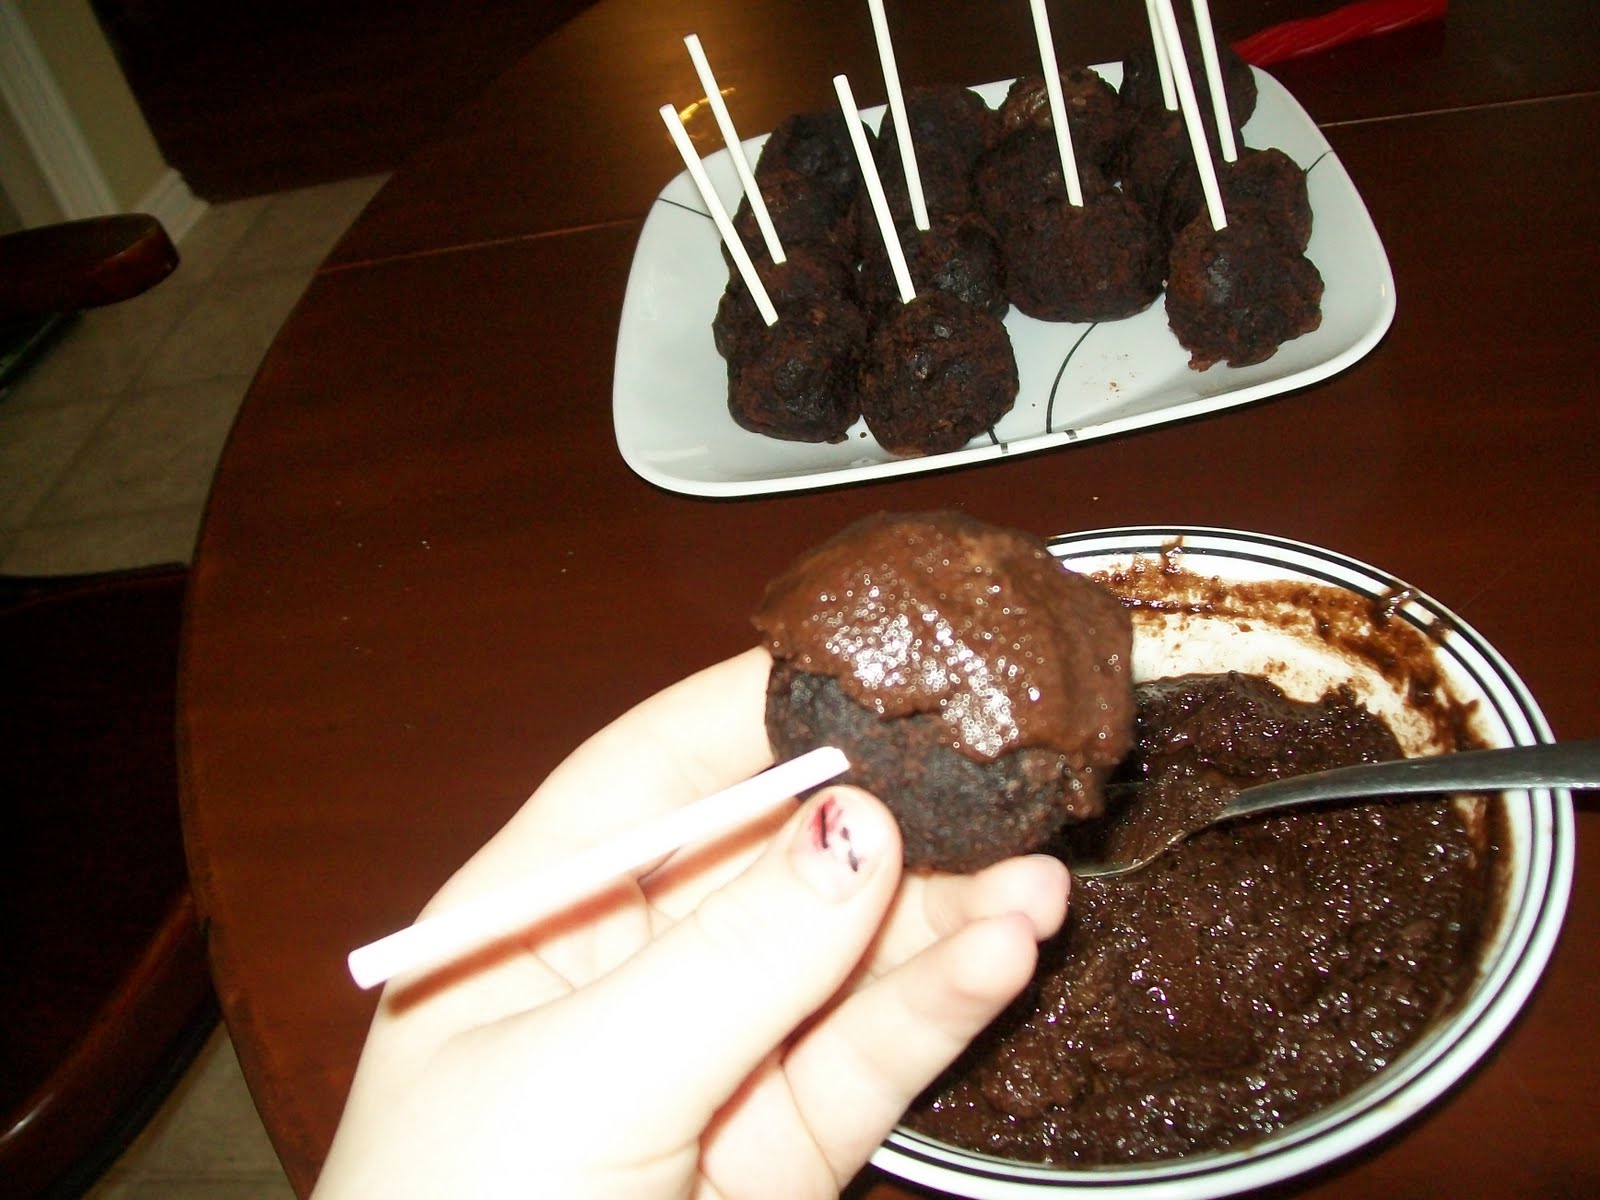
Step 6: Scoop the chocolate mixture on part of the brownie ball.

Step 7: Stick the almonds in the chocolate staight up in rows. Biggest almonds in the first row, medium ones next, and smallest ones last.

Step 8: Put some frosting in a plastic bag, cut off the tip of the corner to make a piping bag.
Step 9: Pipe on the turkey's body. A large circle for its body, a smaller circle for its head, and a peak for its beak.


Step 10: Put on Nerds or sprinkles for the eyes and a piece of licorish for the gobble gobble ( it's acutly called a wattle, but gobble gobble sounds cuter).
Let them harden in the fridge for 15 minutes and Enjoy!


Monday, May 10, 2010

Nancy and Maren are the coolest crafting chicks around!

Tuesday, May 4, 2010

More Adventures on a Budget

In our house M and I like to recycle.Not that we are really green recyclers, we're so not. But, still we want to do our part, however little it may be.
This black beauty was part of our entertainment center. One I got for free. YEAH!
We trimmed it and now it is a shelf much needed for extra stuff that seems to multiply in the bathroom.
The green box I just put some vinyl on and made it cuter. I love how much I can stuff in there without it looking so crowded.
Ok, one of my favorites that I totally got the idea from my friend, is this old spice rack redo that now is my bathroom organizer!
I love doing the 3 R's of being green. Reduce, reuse, and recycle. What can you do to lessen the landfill in your town?


Adventures on Our Budget


Just thought I would post some of my great budget decor in our new home. The curtain topper I bought at a yard sale for a penny. It was just a rectangle that I gathered by hand in the middle of both sides. The white curtain I got at my favorite thrift store for $2.00 and voila!
The flowers were bought at the Dollar store and Maren put them in a vase. So nice to have something to look at when we do our dishes.

Friday, April 23, 2010

Our Mother's Day Adventure: Paper Corsage


Maren is already thinking ahead with this cute wrist corsage that I will definitely wear on Mother's day.
This is a kid friendly project, you probably already have scraps of paper left over from other craft projects. Maren made this in a few minutes while just watching TV.
Here's what you'll need: 3 coordinating scrapbook paper, 1 brad, ribbon, 1 glue dot,scissors. Step 1: Using a 5" square of paper, fold in triangle shape, fold in half , in half again. Cut a round curve to make the petal. Unfold and repeat with a 3" square, 2" square. Step 2: Starting with the largest flower, layer them with the smallest on the top. Using a brad poke a small hole and insert the brad. Step 3: Cut ribbon 10" long and use a glue dot to attach the ribbon to the back of the flower.

Thursday, April 22, 2010

Our Adventure: Fabric Flowers


This week's adventure, we made fabric flowers.
Here's what you'll need to make 1 flower:
3 Fabric Squares (coordinating patterns and 3 sizes)
Hot Glue Gun
A Button
Wooden Craft Stick
Step 1: Fold square into a triangle. then fold in half and in half again.
Step 2: Cut in a zigzag pattern.
Step 3: After each square has been cut, glue each piece (largest to smallest) together. Push down with wood craft stick(so you don't burn your self).
Step 4: Glue on a button, pushing it on with the stick.
Step 5: Turn the flower upside down while still hot, using the wooden stick push on the sides to form bowl shape ( this gives the once flat flower some shape).
Step 6: Let the flower cool and can be added to headbands, bags, and more. Or a pin or clip can be glued to the back of the flower to add some flair to your clothes or hair.